How to Auto-Enter Purchase Bills & Update Stock from a Photo in MyBillBook
Written By Team Flobiz
Last updated 11 months ago
Overview
No typing. No errors. No missed entries.
Upload or click a photo of your purchase invoice - myBillBook automatically creates the purchase entry, adds new items, and updates stock for you.
Why use this feature?
Save hours every week — no manual typing.
Avoid errors in GST, rates & quantities.
Keep stock updated instantly after every purchase.
Create accurate invoices just by uploading a photo.
Video Guide
Step-by-Step Instructions:
Accessing Purchase OCR Scanner
On Android Application:
Multiple Entry Points Available:
Method 1: Navigate to Purchase Transactions and select the “Purchase” option → Then Look for "Scan Invoice" or OCR option on the top-right
Method 2: Use the “Scan and Record Bills” shortcut from the options under “Purchase Transactions”
Launch OCR Home Screen:
Tap on any of the OCR entry points
You'll be directed to the OCR Home Screen
This is your central hub for all invoice scanning activities
Using the OCR Home Screen
Scanning Options:
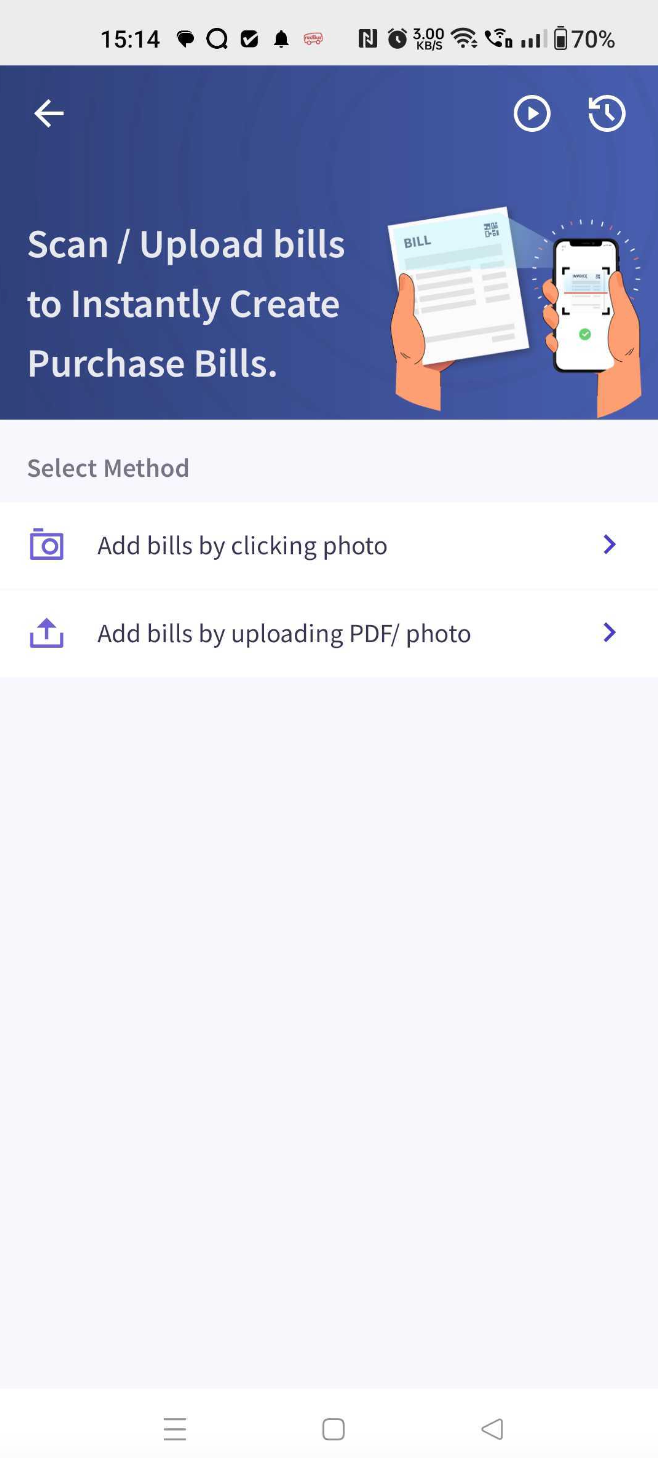
Add bills by clicking photo:
Tap "Capture Photo" or Camera icon
Point your camera at the purchase invoice
Ensure good lighting and the entire invoice is visible
Tap the capture button to take the photo
The OCR system will immediately begin processing
Add bills by Uploading Existing Files:
Tap "Upload PDF/Photo" option
Browse your mobile's file system
Supported formats: PDF files, JPG, PNG images
Select the invoice file you want to process
Wait for the upload and processing to complete
Working with Invoice Preview Screen
After Scanning/Upload:
Review Extracted Information:
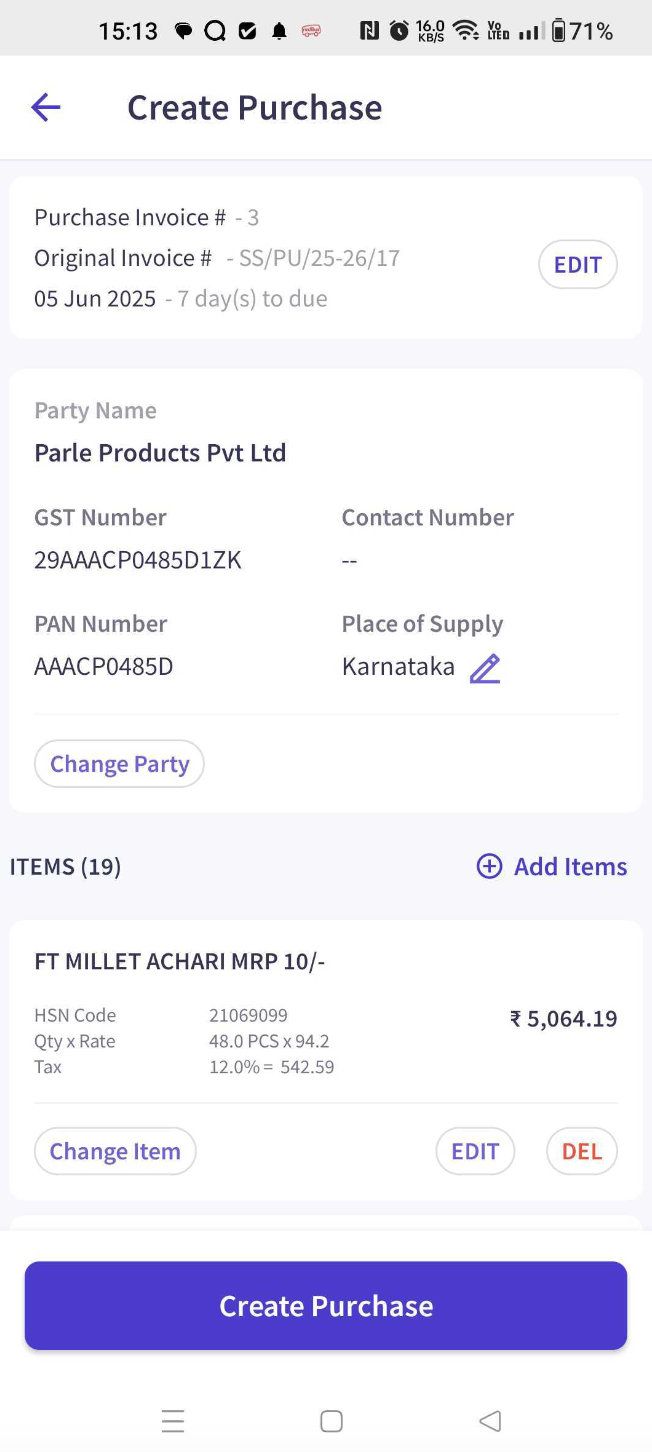
The system displays the Invoice Preview Screen
You'll see three main sections:
Invoice Details (date, invoice number, total amount)
Party Details (supplier/vendor information)
Item Details (products, quantities, prices)
Understanding New vs Matched Tags:
"New" Tag: Items or parties not existing in your system
"Matched" Tag: Items or parties already in your myBillBook database
These tags help you quickly identify what needs attention
Managing Party Details
For New Parties:
Edit Party Information:
Tap on parties marked as "New"
Edit option is visible for new parties
Modify party name, address, GSTIN, contact details
Add any missing information
Save the changes
For Matched Parties:
No edit option - matched parties use existing system data
Verify that the correct party has been matched
If wrong party is matched, you may need to scan again or manually adjust
Managing Item Details
For New Items:
Complete Item Setup:
Tap on items marked as "New"
Editable fields include:
Item name
HSN code
Quantity
Purchase price
Unit of measurement
Other item details
Add Missing Information:
Fill in any fields that OCR couldn't extract
Verify HSN codes for GST compliance
Set appropriate units and measurements
Save the item details
For Matched Items:
Limited Editing:
Only specific fields are editable:
Stock quantity
Purchase price
Other transaction details
Item name and HSN code cannot be changed (uses existing data)
Update Stock Information:
Verify the scanned quantity is correct
Update purchase price if needed
Confirm other relevant details
Adding Additional Items
Manual Item Addition:
Add New Items:
Look for "Add Item" or "+" button on the preview screen
Manually enter item details that may have been missed by OCR
Fill in all required fields
Save the new item
Bulk Addition:
Add multiple items if the invoice contains more products than detected
Ensure all items from the physical invoice are captured
Finalizing and Saving
Complete the Process:
Final Review:
Verify all invoice details are accurate
Check party information is complete
Confirm all items are properly captured
Review tax calculations and deductions
Save Invoice:
Tap "Save" or "Create Purchase Invoice"
The invoice is added to your purchase records
Stock levels are automatically updated
Party information is saved/updated in your system
Managing Upload History
Track Your Scanned Invoices:
Access Upload History:
From the OCR home screen, look for "Upload History" or "History" tab
View all previously scanned invoices
Review Status:
Completed: Successfully processed and saved
Pending: Needs review or completion
Failed: Requires re-scanning or manual entry
Draft: Partially completed, awaiting final save
Re-edit Previous Scans:
Tap on any previous scan to review or modify
Make additional changes if needed
Re-save updated information
OCR home screen
Screen post loading item data from the uploaded invoice
FAQ
What happens if OCR incorrectly recognizes an item?
What happens if OCR incorrectly recognizes an item?
You can edit all details for new items, including name and HSN code. For matched items, you can adjust quantities and prices but not the core item information.
Was this helpful?
Still need help? Share an idea